
Taking pictures is so much fun. Part of that fun is using these incredibly complex little boxes we call cameras. But taking pictures should not just be about the gear you have. After saying that, there are a few things you should teach your child about cameras:
Types of cameras
There are four basic types of cameras on the market today:
- Compact digital camera – Many compact cameras do not allow the user to make decisions about their photos. These cameras will use an onboard computer to determine the best settings for a scene.
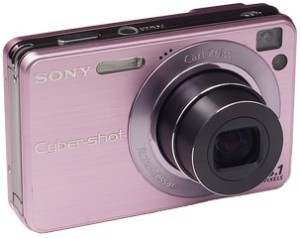
- Phone camera – Cameras in phones used to be very basic but

Phone Camera they have come a long way. Most of the settings are determined automatically but you can download apps that will give you more control.
- Super zoom camera – This type of camera is the middle link between

Super Zoom Camera a compact camera and a DSLR. The photographer usually can take full creative control. It will have automatic settings but you can override them with your own settings. The built-in lens will go from wide angle to superzoom.
- DSLR camera – This stands for Digital Single Lens Reflex. When looking
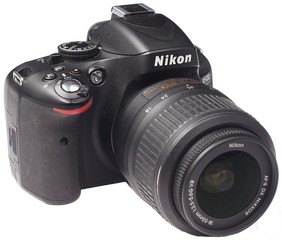
DSLR Camera through the viewfinder you can see exactly what will be in the picture. DSLR’s give the highest quality images but are also the most expensive. You will have full control of all settings and you can also change lenses.

I love shooting with my DSLR because it is so fast and the quality is much higher. But you don’t need an expensive camera to get started. Many of the world’s most famous pictures have been taken with cameras of low quality. The creative decisions are always up to the photographer.
Parts of a camera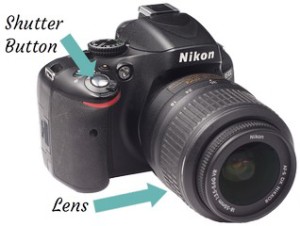
Here are a few parts your child should know:
- Lens – Allows light to enter the front of your camera.
This light will eventually be recorded as a picture. - Shutter button – The button you press to take the picture
- LCD Screen – The screen on the back of the camera used for
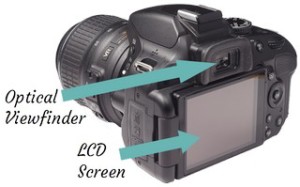 viewing your pictures.
 - Optical viewfinder – The small hole you look through to compose your picture.

Photo modes
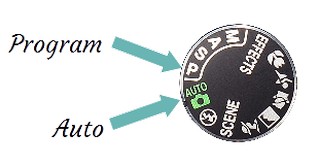 Your camera may have a mode dial like the one shown to the left. A beginning photographer needs to explore their creativity without worrying about camera settings.
For now just use the “Auto” or the“Program” mode. This will tell the camera to make the exposure decisions for you. Just allow your child to concentrate on being creative.
File types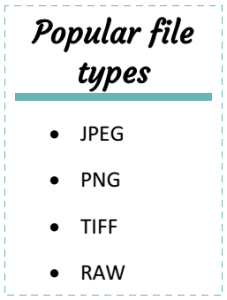
A digital picture can be saved in different file types. The most popular type is the JPEG. A JPEG is a great combination of high quality and small file size. Beginners should use the highest quality JPEG
setting on their camera. If the file size is set too low, your pictures will look fuzzy.
PNG files are similar to JPEGs. TIFF and RAW files are lossless formats. This means there is no loss in quality from the original image. TIFF and RAW files will take up 10 times more space than JPEGs and PNGs.
Turn off the camera’s built in flash
The built in flash on your camera will usually make your pictures look terrible. You will see:
- dark shadows behind your subject

Flash Off - flattened facial features

Flash On - red eye
- a strange mix of light color.

![]()
In addition to all the problems above, on-camera flash also blinds and annoys people. There are better ways to do flash and we will talk about that in later lessons. Look for a lightning bolt icon on your camera to turn off the flash.
Note: Your camera may not allow you to turn off flash in AUTO mode. If this is the case switch to Program mode (P on the mode dial).
Lock your focus
Most cameras focus when you press the shutter button halfway down. Practice this with your child by having them look at the LCD screen while focusing on different objects.
Your camera is probably set to focus on the middle square shown in your viewfinder. To focus on a person that is not in the middle you should:
- Point the middle square at your subject
- Focus by holding the shutter button halfway down
- Move the camera back to where you want it while still holding the shutter button halfway down.
- Take the picture
Review
- Learn the basic parts of a camera
- Set your mode dial to Program(P) or AUTO
- Turn off your flash
- Lock your focus
Photo Assignment:
Take a picture of a toy or other non-living object
Click the above link for a printable photo assignment page!
Leave a Reply